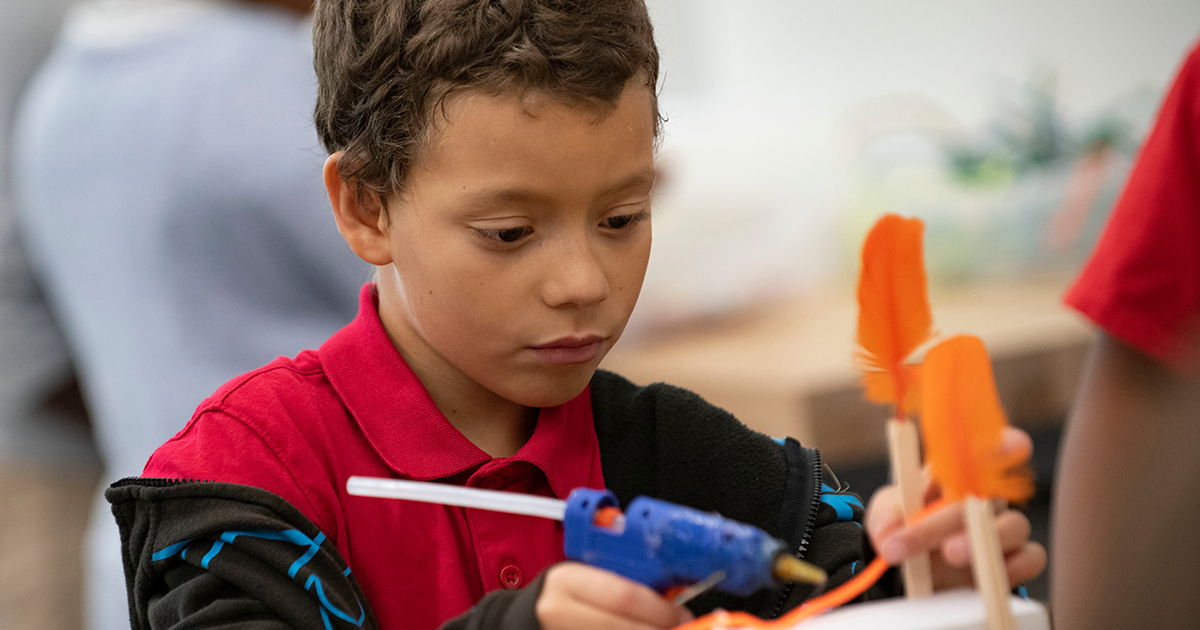
We all want to create engaging, memorable STEAM projects for our students, but finding the time and resources to do so can be a challenge. Many of us would love to get our hands on a 3D printer or a robotics kit but it might not be possible right now. Here’s the good news: you can still create awesome STEAM projects without spending a ton of money. Here are four teacher-tested, student-approved projects that you can do on the cheap.
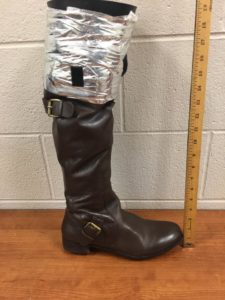 Appreciating engineering by designing a prosthetic leg
Adapted from this project created by Teach Engineering, this activity gets students actively engaged in creating a prosthetic leg using everyday materials. Educator Donna Mccutcheon-Henderson said this project worked great with her Honors Anatomy class.
- Grade(s): 6th – 12th grade
You can modify the project to fit your students’ needs. - Time required: 2 – 3 weeks
This depends on how in-depth you want to get with concepts, construction, presentations, and the post-project discussion. - Learning objectives:
a) Describe the steps of an engineering process needed to develop and build a working leg prosthesis.
b) Detail important features and characteristics necessary for building a prosthetic leg.
c) Analyze and evaluate a completed prosthetic leg to suggest areas of improvement. 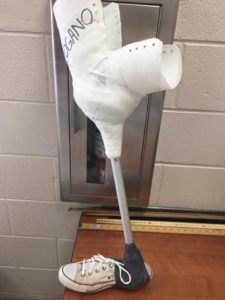 Materials:
Duct tape
Ruler or tape measure
Scissors
Yardstick
Supplies students can find/buy for leg structure: toilet plungers (unused), plastic pipes, metal pipes, metal strips, cardboard tube (from wrapping paper roll), wooden 2 x 4, thin metal duct material (to be rolled and taped into a tube shape)
Supplies students can find/buy for prosthetic comfort: large sponges, scrap bubble wrap, scrap cardboard
Supplies students can find/buy for body attachment: string, rope, twine (about 30 ft.)- Total cost: $0 – $20
Students can use household items and you can ask parents/colleagues to donate supplies if students don’t have them. - Additional information: Donna Mccutcheon-Henderson created this handout when she adapted Teach Engineering’s project to fit the objectives of her Honors Anatomy class. Mccutcheon-Henderson says she gives them three weeks to complete the project. Then she says students “bring it to class where they present the entire design and just walk 10 feet across the classroom wearing the prosthetic. The discussion about engineering design always floors me.”
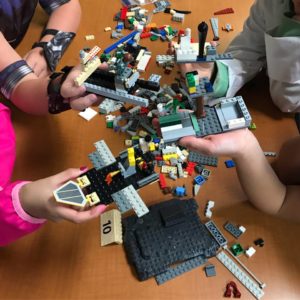 Demonstrating reading comprehension by building a novel’s setting
What do you get when you combine a novel and Legos? A creative STEAM project for English Language Arts students! Librarian Suzette Williams says she had students create different setting elements while reading The City of Ember.
- Grade(s): 4th – 6th grade
- Time needed: 30 minutes – 1 hour
- Learning objectives:
a) Describe different elements of the novel’s setting.
b) Construct the setting using key details from the text to demonstrate reading comprehension.
c) Bonus: Analyze how buildings and other elements create or enhance the mood and conflict in different scenes. - Materials:
Bag of Legos (1 bag per group of 3 or 4 students)
Novel (at least 1 per group) - Total cost: $20 – $40
If you can’t afford a brand new package of Legos, look at alternative brands, check your local second-hand store for cheaper options, or ask if parents or colleagues can donate them. - Additional information: Williams says that students can choose to work collaboratively or individually but that Legos are shared as a table. She also says students are “excited to demonstrate their knowledge and ability to design something they read and learned about in a non-traditional way.”
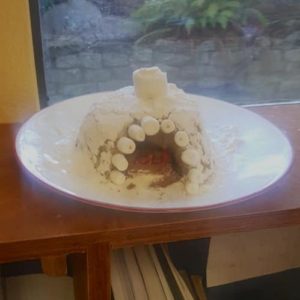 Reinforcing concepts learned by creating a Native American dwelling
When teaching students about the history and habitat of a people, why not use the power of STEAM by having them re-create what they learned? That’s what teacher Heidi Cote did when teaching students about Native American dwellings in this creative, hands-on project.
- Grade(s): K – 5th grade
- Time needed: 3 days
This can be done on a Friday and completed over the weekend. 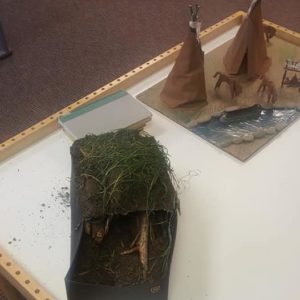 Learning objectives:
a) Demonstrate comprehension by creating one of the Native American dwellings learned about (teepees, cliff dwellings, pueblos, etc.).
b) Use various household materials to show an understanding and appreciation for how dwellings were constructed.
c) Present dwellings in small groups or to the whole class to explain how it was constructed, key details learned about that dwelling and the Native American tribe studied.- Materials:
Household supplies and everyday items such as shoeboxes, glue, toothpicks, grass, sticks, dirt, and toilet paper rolls. - Total cost: $0
- Additional information: Cote says that her students are specifically instructed to use what they have at home. By stating that supplies can’t be bought for this project, it supports their “efforts to recycle and remain creative as a school.”
 Understanding balance and motion by constructing a car
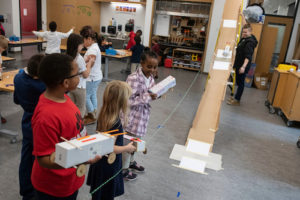
This project was done by teachers Erin Arias, Erin McKee, Marie Russell, and Makerspace Coordinator Olivia Reep; they all work at the Faubion School in Portland, Oregon. They joined forces to create a fun, innovative way to teach students about balance and motion. First, students learned about balance and motion by testing out objects, finding out about the axis and the center of gravity with spinning tops. Using that new knowledge, they constructed cars out of boxes. On the final day, they got to test them out on a ramp!
- Grade(s): 2nd – 3rd grade
- Time needed: 6 hours across 3 weeks
- Learning objectives:
a) Understand the concepts of balance and motion and why some objects balance and others do not by testing them out, recording results, and discussing why.
b) Apply new ideas and what was learned from classroom study of balance and motion to create cars out of boxes and other materials.
c) Test cars on a ramp and analyze why some work better than others. 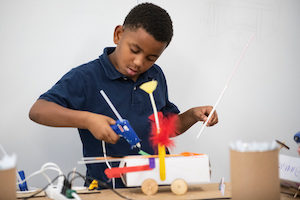 Materials:
Hot glue gun
Tape
Scissors
Boxes to make cars (each one about 10″ x 3″)
Wooden dowels (2 per boxcar)
Wooden wheels (4 per boxcar)
Straws (2 per boxcar)
Items to personalize cars (markers, feathers, pipe cleaners, yarn)- Total cost: $20 – $40
This estimate is based on supplies you may already have, and it also depends on how many students are in your class. To cut costs, you can have small groups work on one car together and ask parents, colleagues, or a craft supply store to donate items needed. 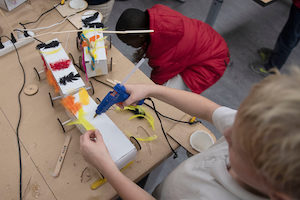 Additional information: Erin McKee recommends pre-drilling the holes on the wooden wheels. She also says that it might help to “discuss how an axle works on a car” explaining that the first group “struggled to position the dowel/wheels in a way that made them rotate.” Olivia Reep adds that it’s important to “allow time for discovery to focus on the process of problem-solving — not finishing a project. ” Students should be given space to learn independently. “Don’t give answers too quickly. Ask questions. Remind them that there’s always a different way to do something. Mistakes/failure is your greatest teacher. Don’t take it as a setback — learn from it.”
Categorized as: Tips for Teachers and Classroom Resources
Tagged as: Art, Engaging Activities, Math and Science, Mathematics, Science, STEAM
